RIDE'N ON AIR
"Ride + Low = Cool Ride From Air Ride"
story and photos by John and Julia Aschenberg
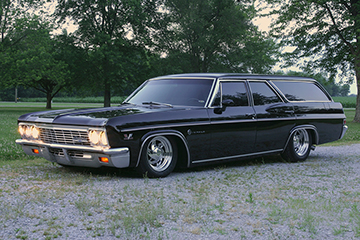
There are several ways of lowering your vehicle in order to make it look cool. One method of getting your ride down in the weeds is by cutting your coil springs down. Another way would be to heat the springs up with a torch. However, lots of times when you apply heat to the spring, you might get the look you want, but you loose the quality of your ride. Well the people at Air Ride Technologies from Jasper, Indiana has the solution with their quality Air Ride Suspension. With their continued research and development they strive to get the ride and look you need and want.
Our project started out with needing to rebuild a 12 bolt posi rear end. After thinking about the poor quality of ride we had due to the coil springs being heated up, it was only natural we do something about the ride. so the friendly folks at Air Ride Technologies were contacted and they stated the "Cool Ride" package is just what we needed. In no time we had our new air ride suspension sitting on our front porch. Openin up the boxes and inspecting everything was like Christmas in April.
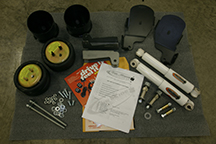 Front
air ride kit
Front
air ride kit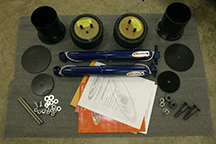 Rear
air ride kit
Rear
air ride kit
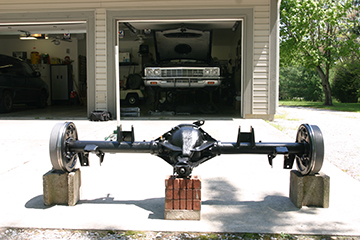
We tackled the rear first, being we already had the 12 bolt differential out from under the car. You don't need to take the rear end out in order to install the air suspension, however, ours was out and gave us the opportunity to do some cleaning under the car. At this time we applied 2 coats of POR-15 chassis coat.
We assembled the cup, airbag, and bottom washer to the lower control arm with new polygraphite bushings installed. Everything was mounted up underneath the car to check for clearance between the bag and the coil spring pocket. If more room is needed, take the time to cut the lip out on the spring pocket. The air lines were ran next and be sure to use a grommet if you're running the line through a hole in the frame. Also, when cutting the air line, make sure to cut the line clean and straight or it won't seal. Another thing to remember is to keep your airlines away from any sharp edges and especially away from any heat sources. Next we installed the newly rebuilt 12-bolt and things were starting to come together.
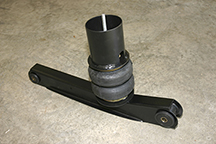 Rear
airbag with control arm
Rear
airbag with control arm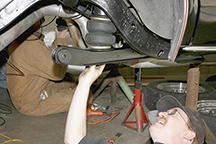 Checking
for pocket clearance
Checking
for pocket clearance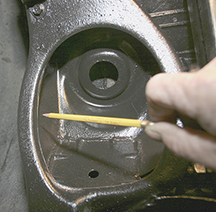 Marking
spring pocket for cutting lip
Marking
spring pocket for cutting lip
Moving to the front we mounted the air bag up in the spring pocket and marked how much was needed to be cut out on the lip. After that, the pocket was ground smooth, painted and ready to install. It's vital to get the necessary clearance you need, we used a air sawzall cutoff tool which worked good, but if you have access to a plasma cutter go for it. We then mounted the lower plate with the shock mount to the lower control arm. After mounting the whole suspension back in place, tack weld the shock mount for now and install the shock to make sure it doesn't bottom out on the suspension travel.
 Marking
amount of lip to cut
Marking
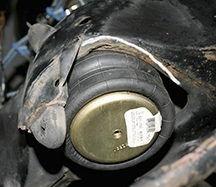
amount of lip to cut Installing
front airbag
Installing
front airbag Lower
plate with shock mount mounted to control arm
Lower
plate with shock mount mounted to control arm
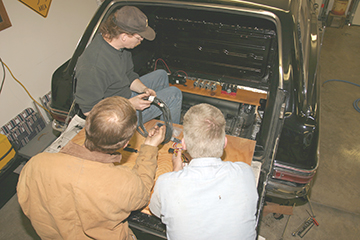
The compressor system was the last thing on the list. We found the best
place for our installation was in the back hidden floor compartment. Dynamat
was installed to reduce noise and keep heat to a minimum. 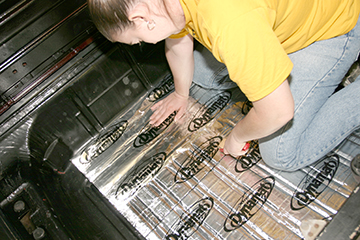 To
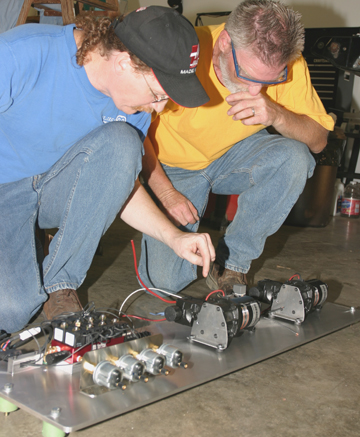
give us as much room as possible an aluminum shelf was milled to house
all the compnents with the ARC 4100 E 4 wheel compressor system with 4
way Ride Pro controller. the aluminum shelf was then mounted above the
air tank, which gave us more room in the hidden floor compartment, but
also maintained a professional look to the installation. After all the
wiring was complete it was time to program the new system and take it
out on the road.
To
give us as much room as possible an aluminum shelf was milled to house
all the compnents with the ARC 4100 E 4 wheel compressor system with 4
way Ride Pro controller. the aluminum shelf was then mounted above the
air tank, which gave us more room in the hidden floor compartment, but
also maintained a professional look to the installation. After all the
wiring was complete it was time to program the new system and take it
out on the road.  Boy
what a difference it made in the ride and handling with the new Air Ride
Technologies suspension.
Boy
what a difference it made in the ride and handling with the new Air Ride
Technologies suspension.
As always most of us car crazed owners get lots of help from differnt people and we wanted to say thank you to everyone at Air Ride Technologies for being so kind to answer all our questions. Also, thanks to brother-in-law, Jerry Wetli at Wet-tech Inc for all the milling work on the compressor board and many nights of installation help. Finally, thanks to the rest of our family, Herb Wetli, Missy Houghtaling, and our daughter Crystal Riehle for their many nights of working on the car to help us get the wagon back on the road before our summer was over. with everyone's help we obtained oh yeah, just what the doctor ordered, a cool ride! Big difference like day and night. Now our wagon has a kick ass killer attitude just sitting still!
To see the gallery of all the Air Ride install images click here.